Installing the TFT display
Edit me
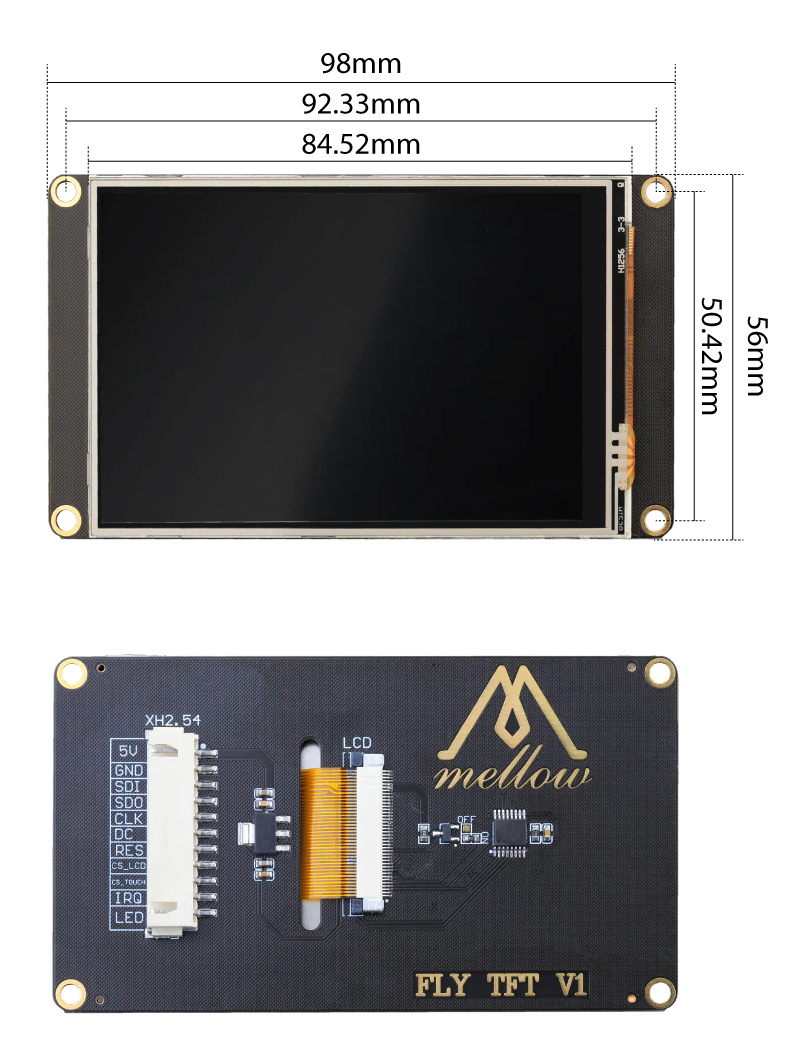
Dimensions
Installing the TFT Display
Note: Before starting to set up the TFT display, confirm that you have read and completed the Fly OS system setup
Edit the FLY-config.conf file
-
Open an SSH or telnet session to your Fly-Pi
-
CD to the /boot folder
cd /boot -
Edit the FLY-config.conf file
sudo nano FLY-Config.conf -
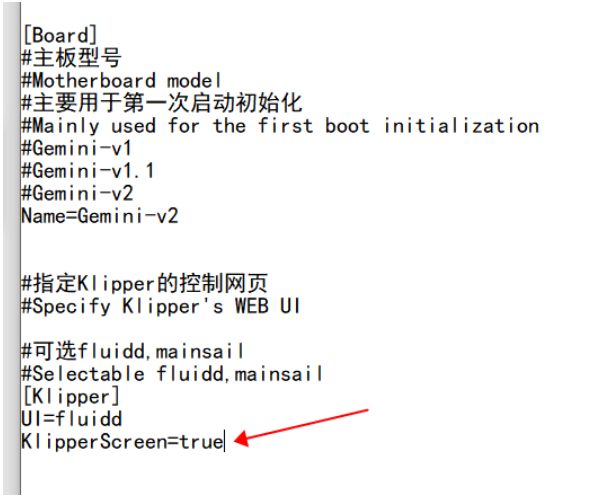
Find the line
KlipperScreen=falseand change it toKlipperScreen=true
Fly-Config Enable Klipper Screen -
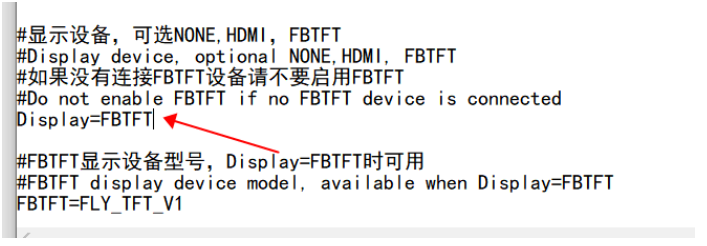
Find the line
Display=NONEand change it toDisplay=FBTFT
Fly-Config set display to TFT -
Press CTRL + X and save the changes to the FLY-config.conf file
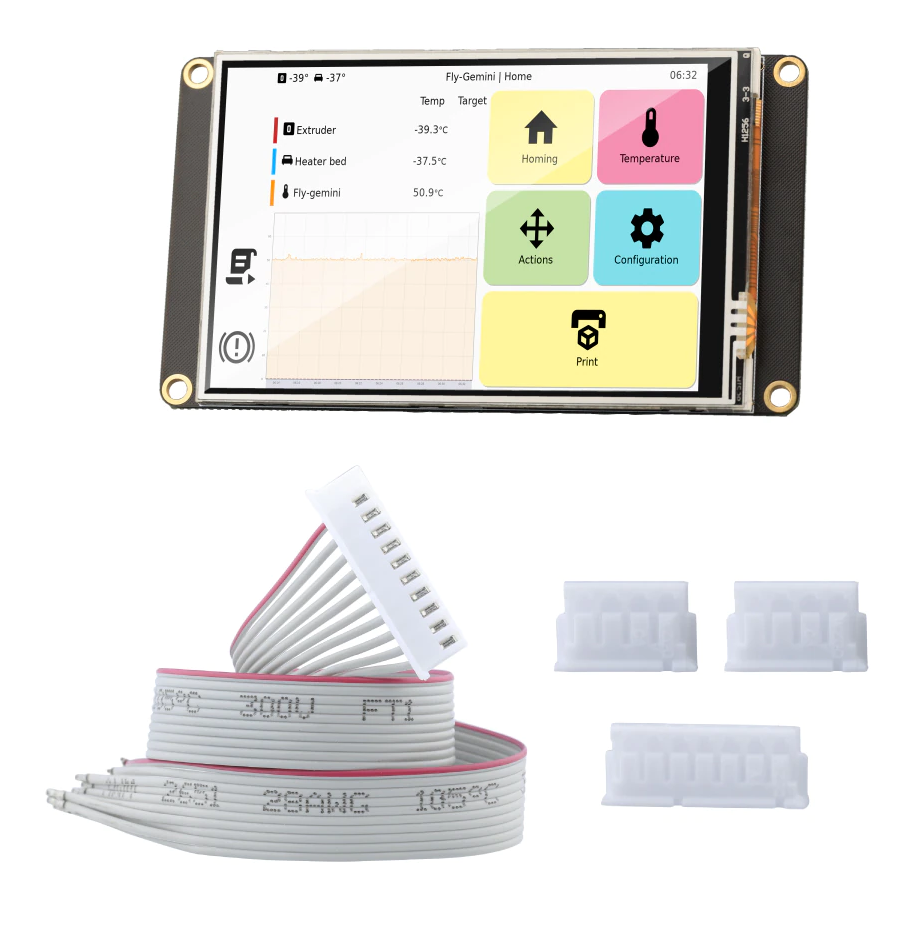
Assemble the TFT wiring harness
-
The SBC plugs need to be added to the wiring harness. Follow the wiring diagram for your board.
-
Fly-Pi TFT wiring diagram
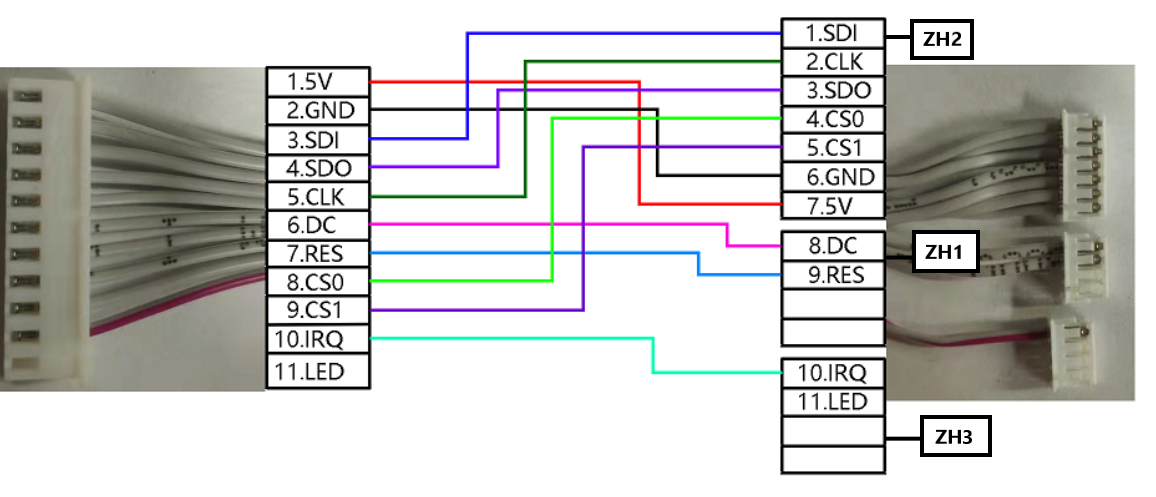
Fly Pi TFT wiring
-

Connect the TFT wiring harness to the Fly-Pi
-
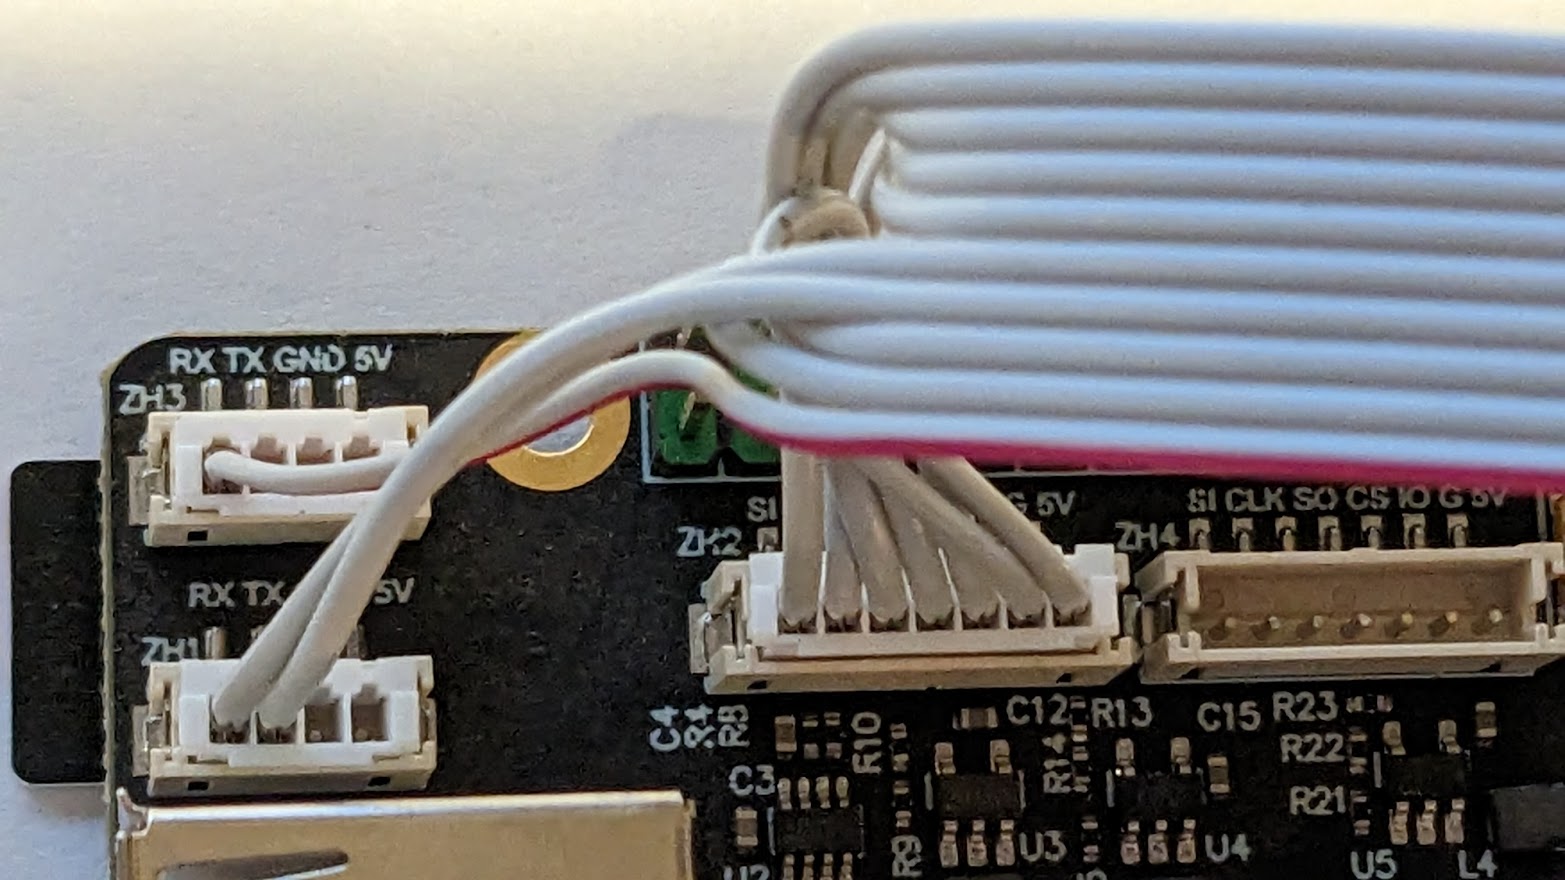
Insert the 3 TFT wiring harness connectors to the Fly-Pi as shown.

Fly Pi TFT sockets -
Power on the Fly-Pi and wait for the display to start.
Note: It will take few minutes to boot up for the first time after modifying Display settings. Give it time for the system to configure the display and start up.