General information regarding the Fly Puppet
Edit me
Overview
Description
This page covers any general information for the Fly Puppet board.
Avaliable from the Mellow store on Aiexpress
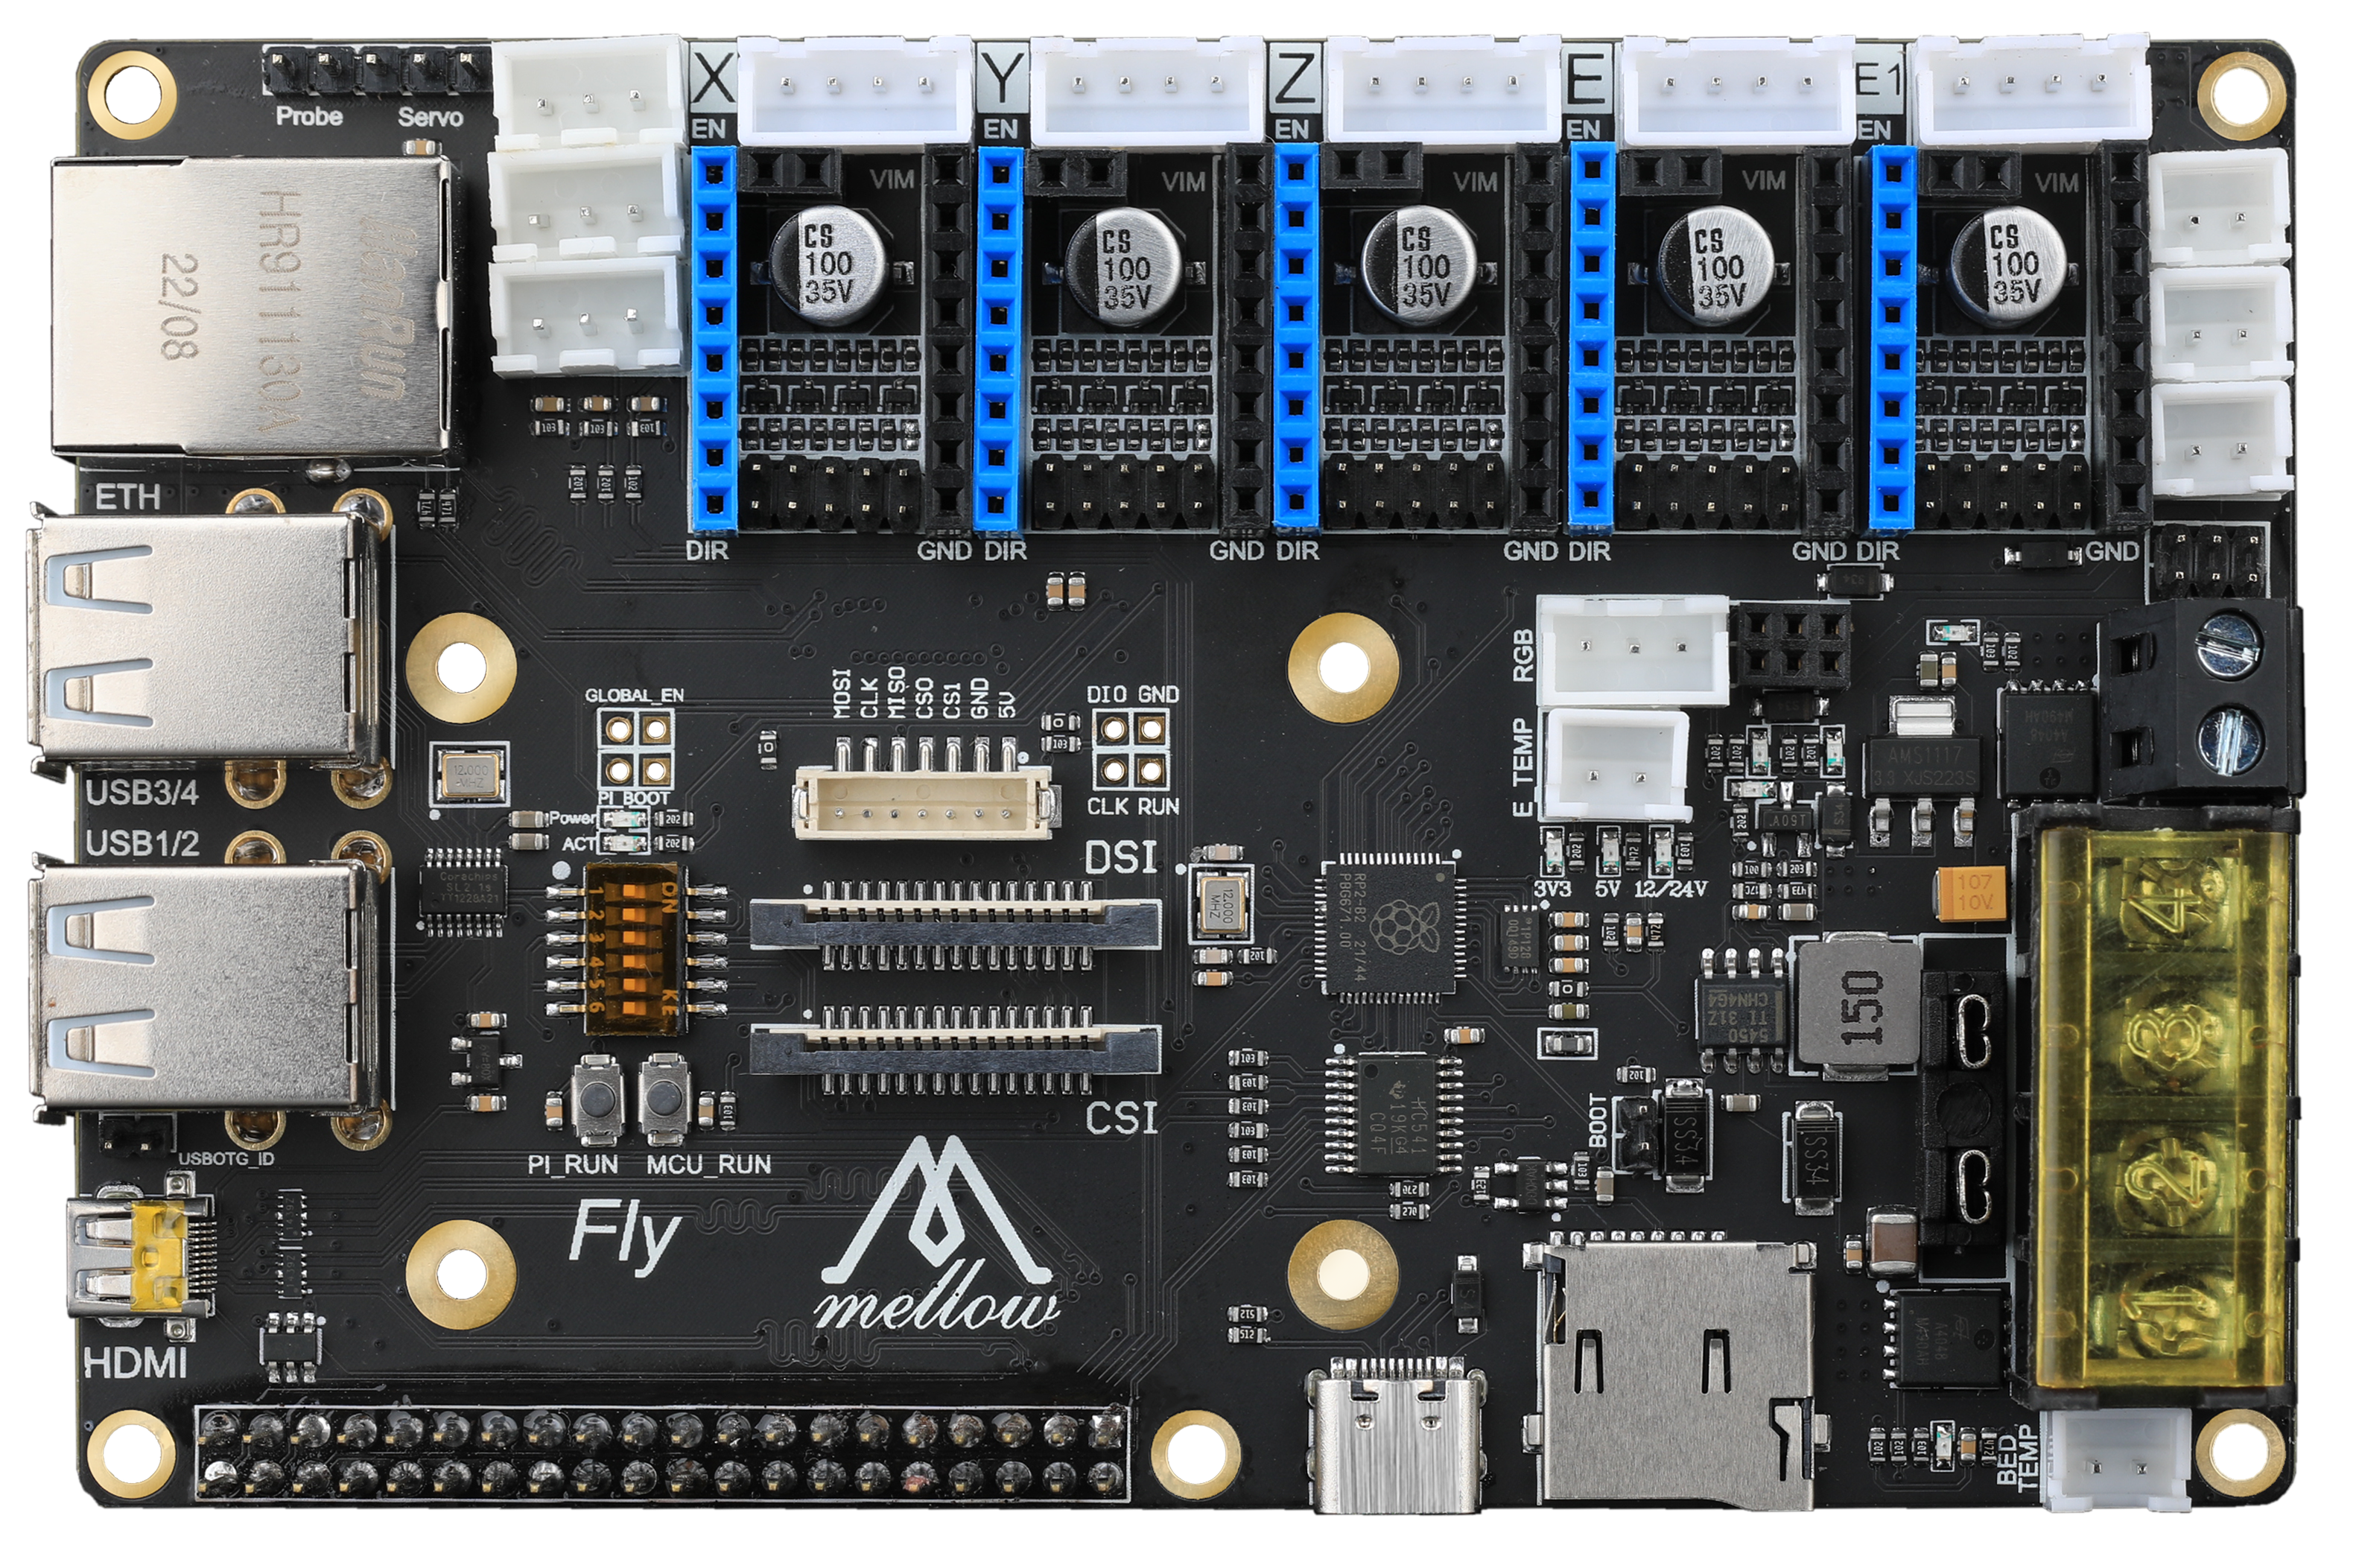
In order to meet the needs of customers using RP2040 5-axis, we made a fly-puppet motherboard. If you use Raspberry Pi cm4, then this motherboard will become an integrated board of Raspberry Pi 4 + 3D printer motherboard, and run klipper firmware directly. At the same time, it can also connect to Fly Pi, Raspberry PI 3/3b/4b through the 40p GPIO header. 5-axis fits most machines on the market today, and it’s a very interesting board.
Features
- Supports mounting Rasberry Pi CM4, 4B, 3B, 3, and Fly Pi
- MCU: RPI RP2040
- Communication: UART
- 12/24V input
- 3A 5V power supply
- Drivers supported: A4988, LV8729, DRV8225, TMC2208, 2209, & 5160
- Interfaces
- 2 CNC Fans with replacable Fly MOS
- 1 Full power fan
- Bed and Hotend Tempreture
- RGB LED port
- BLtouch port
- 3 Limit switch inputs
- HDMI, CSI, DSI, USB and Ethernet with CM4
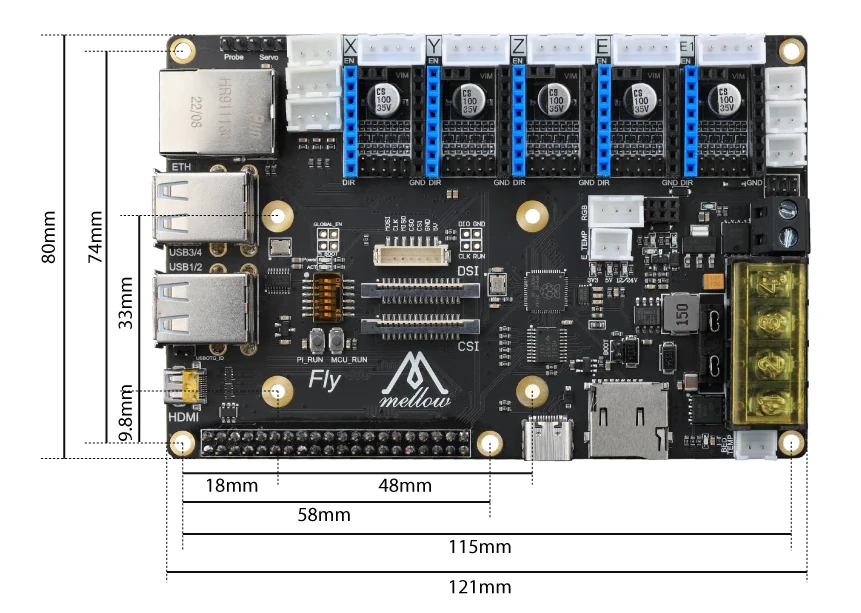
Dimensions
BOM
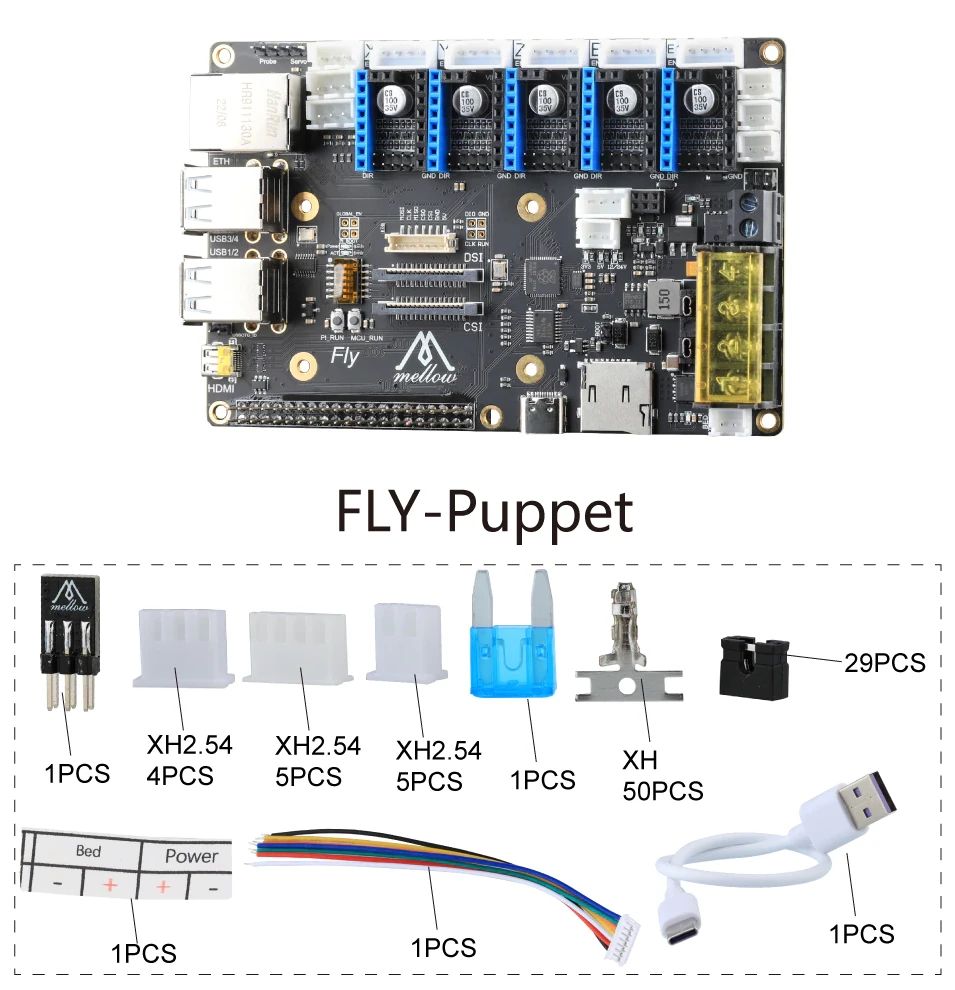
- Fly Puppet Board
- Fuse
- JST-XH connectors and crimp terminals
- Fly MOS
- USB C Cable
- Serial header pigtail
- Jumpers
Driver mode and Fan Voltage Jumpers

USB DIP Switches
-
6P DIP switch is used for USB control, all of them are OFF by default.
- DIP switches 1 and 2.
- ON: Extend the USB of CM4 to the 4 onboard USB ports, they cannot be ON at the same time as switches 5 and 6
- DIP switch 3 and 4
- ON: Connect the USB of the lower computer RP2040 to the onboard Type-c interface. Cannot be ON with switches 5 and 6 at the same time
- DIP switch 5 and 6
- ON: Connect the USB of CM4 to the onboard Type-c interface for CM4 EMMC programming. Cannot be ON with switches 1,2,3 and 4 enabled.