Klipper configuration on the Fly SHT-36 V2 for CAN bus
Edit me
Important: This guide assumes you have a working Klipper host installation on a Raspberry Pi or compatible device
Setup steps
Toolboard firmware
Note: The SHT36 V2 shipps with CanBoot firmware installed. You can skip to the Klipper section. This section is only needed for re-installing CanBoot
Compile CanBoot firmware
-
ssh to your klipper host console
- Install the burning utility to your klipper host system
sudo apt install dfu-util -y - Clone the CanBoot firmware to your Klipper Host
cd ~/ git clone https://github.com/Arksine/CanBoot - From your Fluidd or Mainsail web UI Edit Moonraker.conf and add the following at the bottom to allow moonraker to manage updates to the CAN bus software.
[update_manager CanBoot] type: git_repo path: ~/CanBoot origin: https://github.com/Arksine/CanBoot.git is_system_service: False - cd to the Canboot directory
cd CanBoot - Run make clean
make clean - Open menuconfig
make menuconfig
Note: Note, SHT-36 V2 units shipped before 2022-10-18 will use the GD32F103 CPU, later shipments will use the APM32F072 CPU
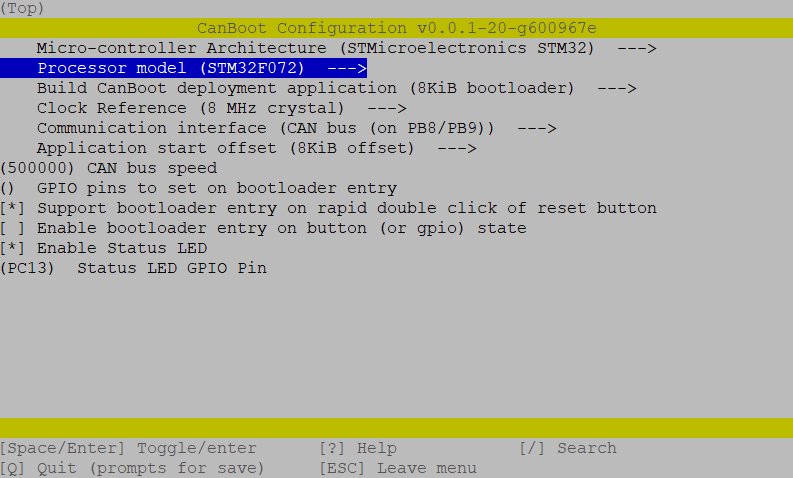
- Set the following settings for the APM32F072 CPU
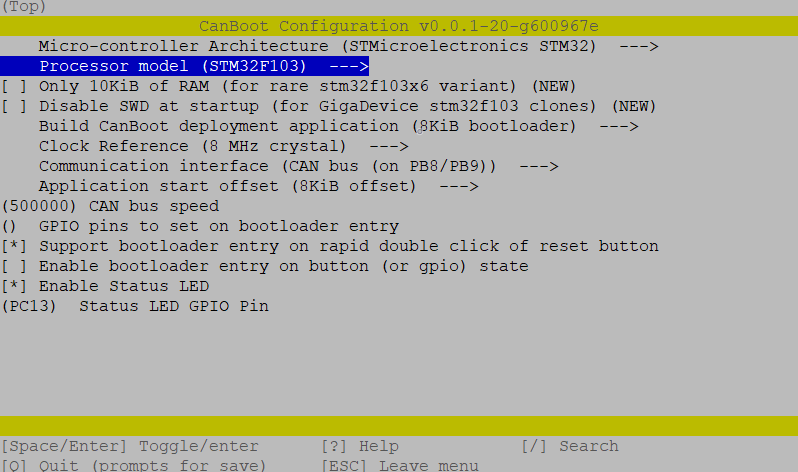
- Set the following settings for the GD32F103 CPU
-
Quit and save the configuration
- Run the make command to compile the firmware
make - You should now have a canboot.bin file at ~/CanBoot/out/
Burn CanBoot firmware to tool board
-
Install the boot jumper to the Boot0 pin and 3.3v pin as pictured.
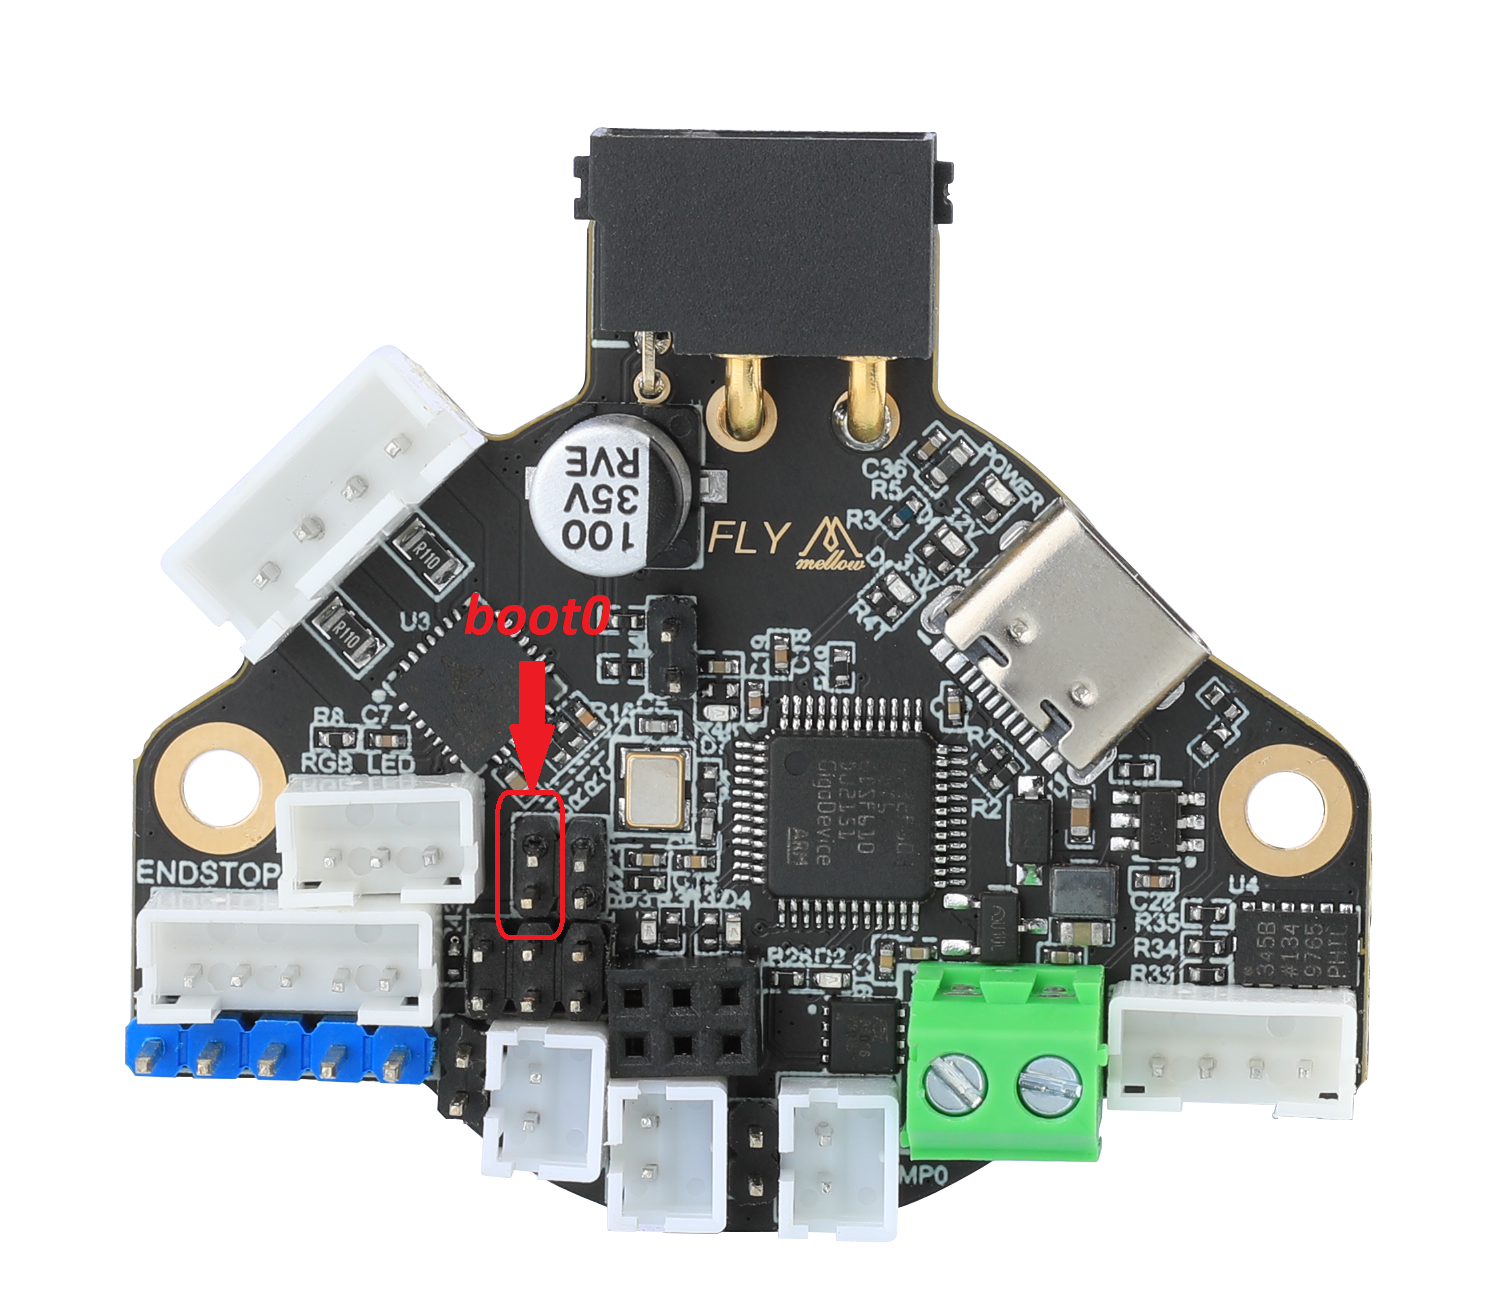
DFU jumper location - Use a USB-C data cable to connect the SHT-36 V2 board to the klipper host, Make sure that the dfu jumper is installed before connecting the USB cable.
- Run lsusb to see if the connection is successful, copy the USB ID in the blue box. Note that the board is in DFU mode.
lsusb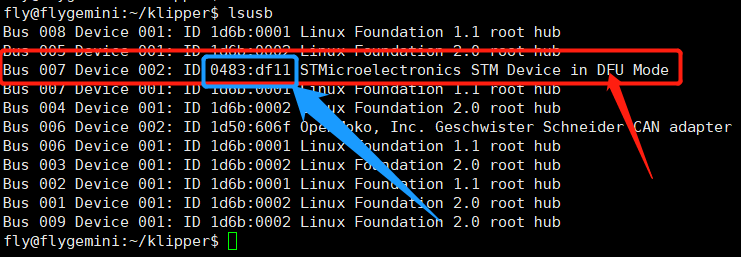
lsusb Results - Erase and Burn the firmware , replace 0483:df11 in the following command with the USB ID copied earlier
sudo dfu-util -a 0 -D ~/CanBoot/out/canboot.bin --dfuse-address 0x08000000:force:mass-erase:leave -d 0483:df11 -
You should get a download progress bar and File downloaded successfuly when the burning is complete.
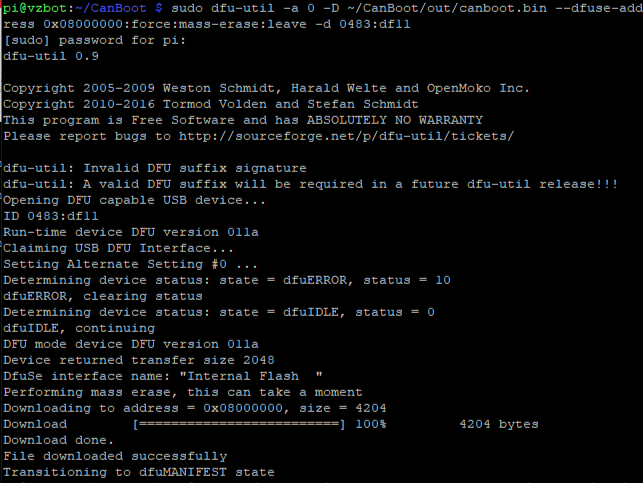
CanBoot burn complete - If the burn was sucessful remove the jumper from the Boot0 pin and power cycle the printer.
- The tool board is now ready to install klipper firmware.
