How to compile and install the klipper firmware running on a Fly-CDYv2 in USB mode
Edit me
Configuring and installing Klipper for USB
Compile Klipper firmware for Fly-CDYv2
Tip: To read more about the KCONFIG_CONFIG option, see here
- ssh to your klipper host console
-
cd to the klipper directory
cd ~/klipper -
Run make clean
make clean KCONFIG_CONFIG=config.cdyv2 -
Open menuconfig
make menuconfig KCONFIG_CONFIG=config.cdyv2 - Set the following settings
- [*] Enable extra low-level configuration options
- Micro-controller Architecture (STMicroelectronics STM32)
- Processor model (STM32F407)
- Bootloader offset (32KiB bootloader)
- Clock Reference (8 MHz crystal)
- Communication interface (USB (on PA11/PA12))
- USB ids
-
() GPIO pins to set at micro-controller startup

Klipper Menu Config USB
- Quit and save the configuration
-
Run Make to compile the firmware
make KCONFIG_CONFIG=config.cdyv2 -j4
Flash Klipper to the Fly-CDYv2 MCU
- ftp to your klipper host with an FTP client like FileZilla
- open the folder ‘~/klipper/out’.
- download klipper.bin to your PC.
- place the MCU MicroSD card into a card reader and connect it to your PC.
- ensure that the SD Card is formatted as Fat32. If in doubt use the SD Card Formatter.
- Copy the klipper.bin file to the root of the SD card.
- rename klipper.bin to firmware.bin
- Eject the SD card from the PC
-
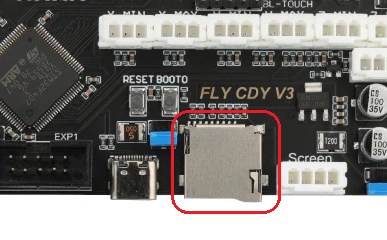
Insert the SD card into the Fly-CDYv2 SD card Slot.

FLy-CDYv2 SD card -
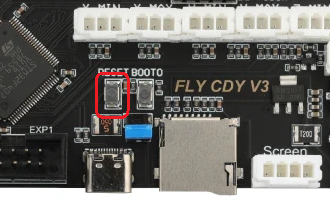
Press the MCU reboot button

Fly-CDYv2 reset -
Wait a few minutes
-
Open a putty SSH session to your klipper host and log on
- run lsusb to verify the MCU has been discovered as a klipper device